 Save
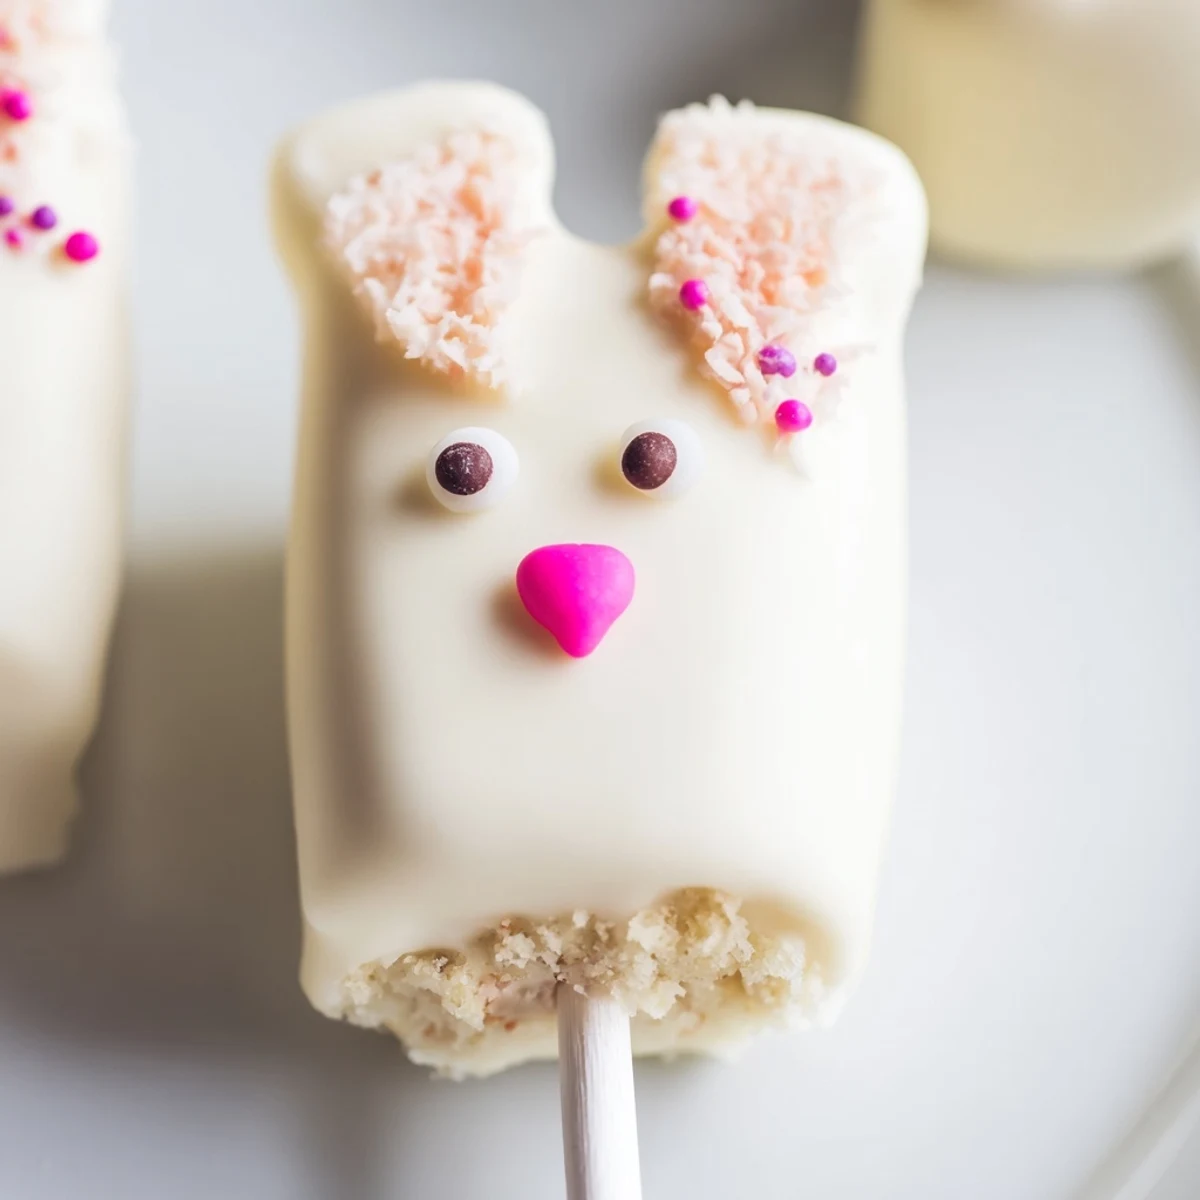
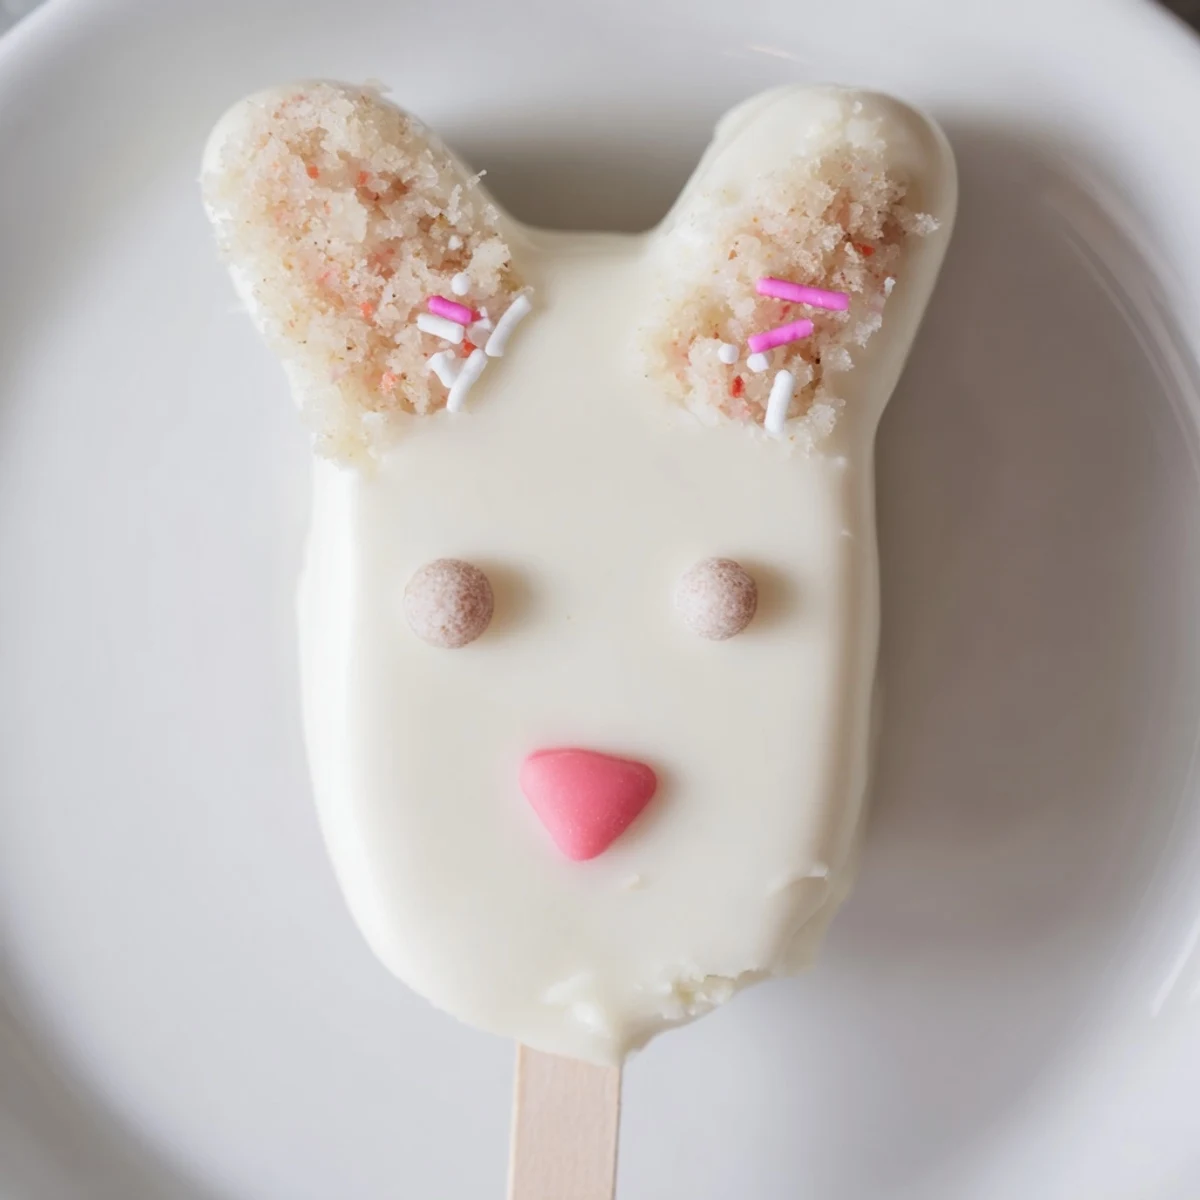
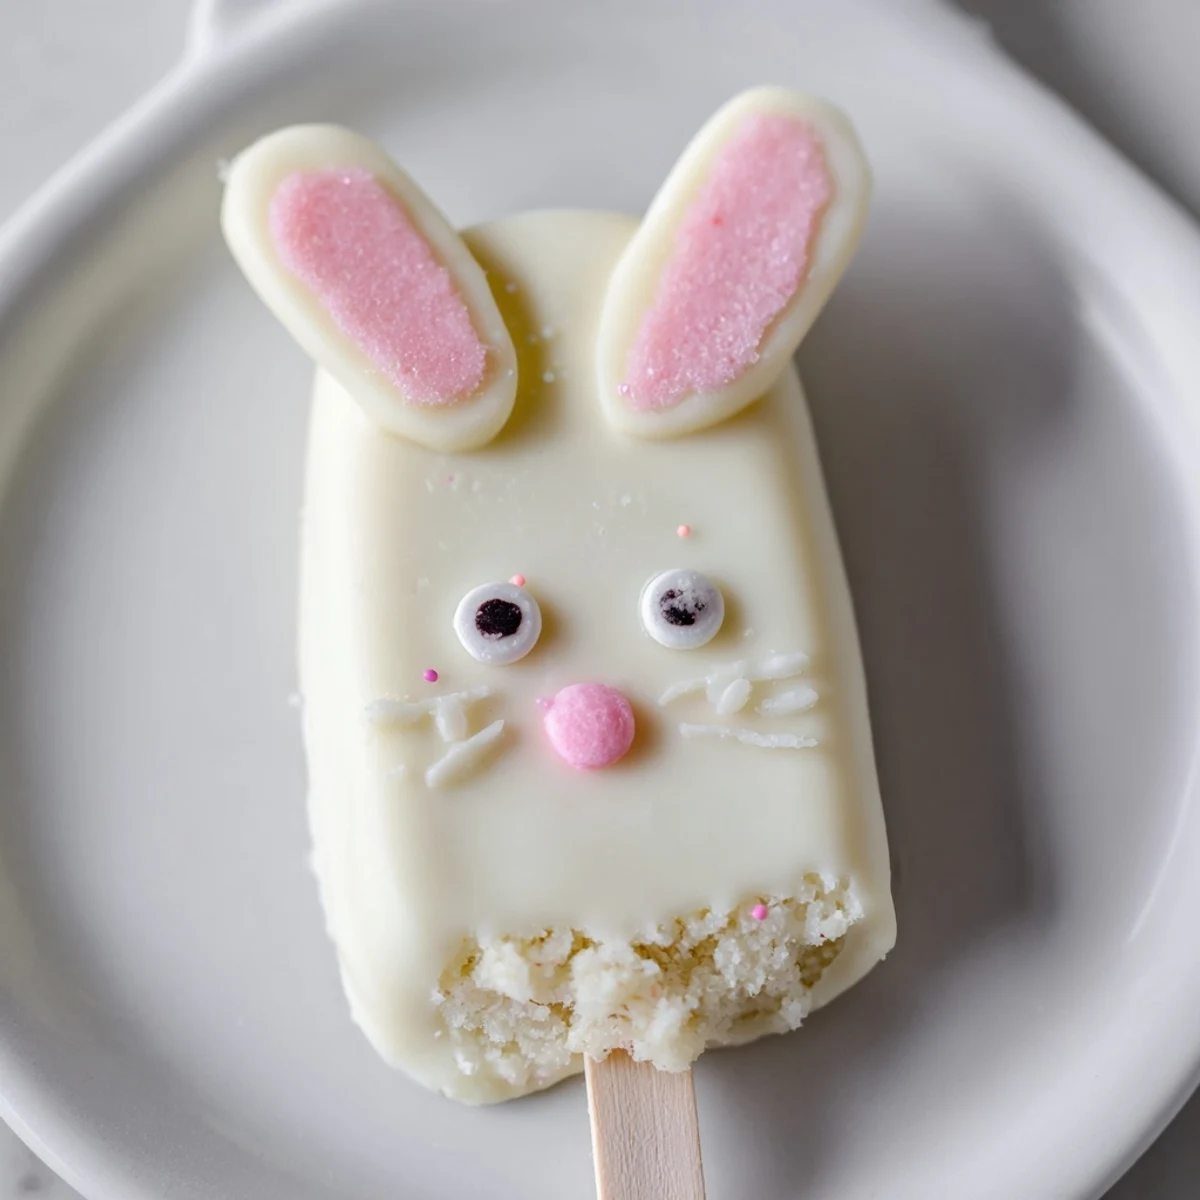
Save These whimsical bunny-shaped treats combine moist vanilla cake with a rich white chocolate coating, creating the perfect festive dessert for your Easter celebration. The cake mixture blends vanilla crumbs with cream cheese and butter for a perfectly fudgy texture that holds its shape beautifully when dipped.
Each cakesicle features a playful bunny face that you can customize with candy eyes, sprinkle whiskers, and fondant ears. The white chocolate shell provides a creamy sweetness that balances the cake interior perfectly.
Making these treats is simple—mix your cake dough, shape into bunny faces, chill until firm, then dip in melted white chocolate. The decorating possibilities are endless, making them a fun activity for families and a stunning addition to any Easter dessert spread.
The first time I made these bunny cakesicles, my kitchen counter looked like a pastel explosion gone wrong. White chocolate splattered everywhere, sprinkles embedded in the grout, and eight lopsided bunny faces staring back at me. But when my niece walked in and gasped like she'd just seen the Easter Bunny himself, every messy second became worth it.
Last Easter, I made three dozen of these for my daughters preschool party and learned something important about supply and demand. The other moms kept asking where I bought them, and when I explained they were just repurposed cake from the weekend, half of them started taking notes on their phones.
Ingredients
- Vanilla cake crumbs: Ive used everything from leftover birthday cake to store bought cupcakes, and honestly, the slightly stale stuff works even better
- Cream cheese: This is the secret binder that makes the mixture hold together without turning into a paste
- Unsalted butter: Room temperature is non negotiable here or youll be fighting lumps forever
- Powdered sugar: Just enough to sweeten the deal without making things cloyingly sweet
- Vanilla extract: Pure vanilla makes a noticeable difference in the final flavor profile
- White chocolate: Candy melts are easier for beginners but real white chocolate tastes infinitely better
- Cakesicle sticks: Insert these at an angle for better stability and fewer tragic bunny decapitations
Instructions
- Mix the cake base:
- Combine all the cake mixture ingredients in a medium bowl and work them with your hands until you have something that resembles playdough. The texture should hold together when squeezed but still feel slightly moist.
- Shape your bunnies:
- Divide into eight portions and gently flatten each into an oval shape with slightly pointed top corners for ears. Dont stress about perfection here, the chocolate coating hides a multitude of shaping sins.
- Add the sticks:
- Press a cakesicle stick about halfway into each bunny shape, then arrange them on a parchment lined baking sheet. The chilling step is crucial, so dont rush this part.
- Melt the coating:
- Microwave your white chocolate in 30 second intervals, stirring thoroughly between each burst. White chocolate is notoriously finicky and will seize if overheated, so patience is your friend here.
- Dip and decorate:
- Holding each cake pop by the stick, lower it into the melted chocolate and rotate until completely coated. Gently tap against the bowl edge to let excess drip off, then immediately add decorations before the coating sets.
 Save
Save My daughter still talks about the Easter Sunday when we made these together and she accidentally gave every bunny three eyes instead of two. We decided they were alien bunnies visiting Earth for the holiday, and that became our weird little family tradition.
Making Them Ahead
Ive learned through trial and error that these actually taste better after sitting overnight in the refrigerator. The flavors have time to meld together and the coating firms up perfectly. You can make the cake shapes up to two days before dipping them, just store them in an airtight container so they dont dry out.
Decoration Ideas That Work
Beyond the standard candy eyes and sprinkles, Ive had great success with using pink modeling chocolate for floppy ears. Pretzel sticks dipped in pink chocolate make adorable long bunny ears that actually add a nice salty crunch contrast. Last year I even used shredded coconut for fuzzy bunny texture, which was surprisingly effective.
Serving And Storage
These disappear fast at parties, so I always make extra. Stick them into a piece of Styrofoam wrapped in Easter grass for an impressive display that keeps them upright. Any leftovers can be stored in the fridge for up to three days, though the white coating might start to show condensation spots.
- Let refrigerated cakesicles come to room temperature for 10 minutes before serving
- If the coating looks cloudy from fridge storage, a quick blast with a hair dryer on low restores the shine
- Package individually in clear treat bags tied with pastel ribbon for adorable party favors
 Save
Save Theres something unexpectedly satisfying about turning cake scraps into something so joyful. These bunny cakesicles have become my go to way to spread a little happiness every spring.
Recipe FAQs
- → How far in advance can I make these cakesicles?
-
You can prepare these treats up to 3 days ahead. Store them in an airtight container in the refrigerator to maintain freshness and prevent the white chocolate from becoming soft or discolored.
- → Can I use different cake flavors?
-
Absolutely! Chocolate, lemon, red velvet, or carrot cake work wonderfully. The neutral white chocolate coating complements any cake flavor, so feel free to use your favorite or whatever cake you have available.
- → What if I don't have cakesicle molds?
-
No problem! You can shape the mixture by hand into flattened bunny faces or ovals. The dough-like consistency holds together well once chilled, making it easy to form shapes without specialized equipment.
- → How do I prevent the white chocolate from seizing when melting?
-
Melt in 30-second bursts, stirring thoroughly between each interval. Avoid getting any water into the chocolate—even a few drops can cause seizing. If it becomes too thick, add a teaspoon of vegetable oil to smooth it out.
- → What's the best way to decorate the bunny faces?
-
Work quickly while the chocolate coating is still soft. Add candy eyes, press sprinkles for whiskers, and attach fondant or modeling chocolate ears. For more detailed designs, use food-safe pens after the coating has fully set.
- → Can I freeze these treats for longer storage?
-
Yes! Place them in a freezer-safe container with parchment paper between layers. They'll keep for up to 2 months. Thaw in the refrigerator for several hours before serving to prevent condensation from affecting the chocolate coating.
