 Save
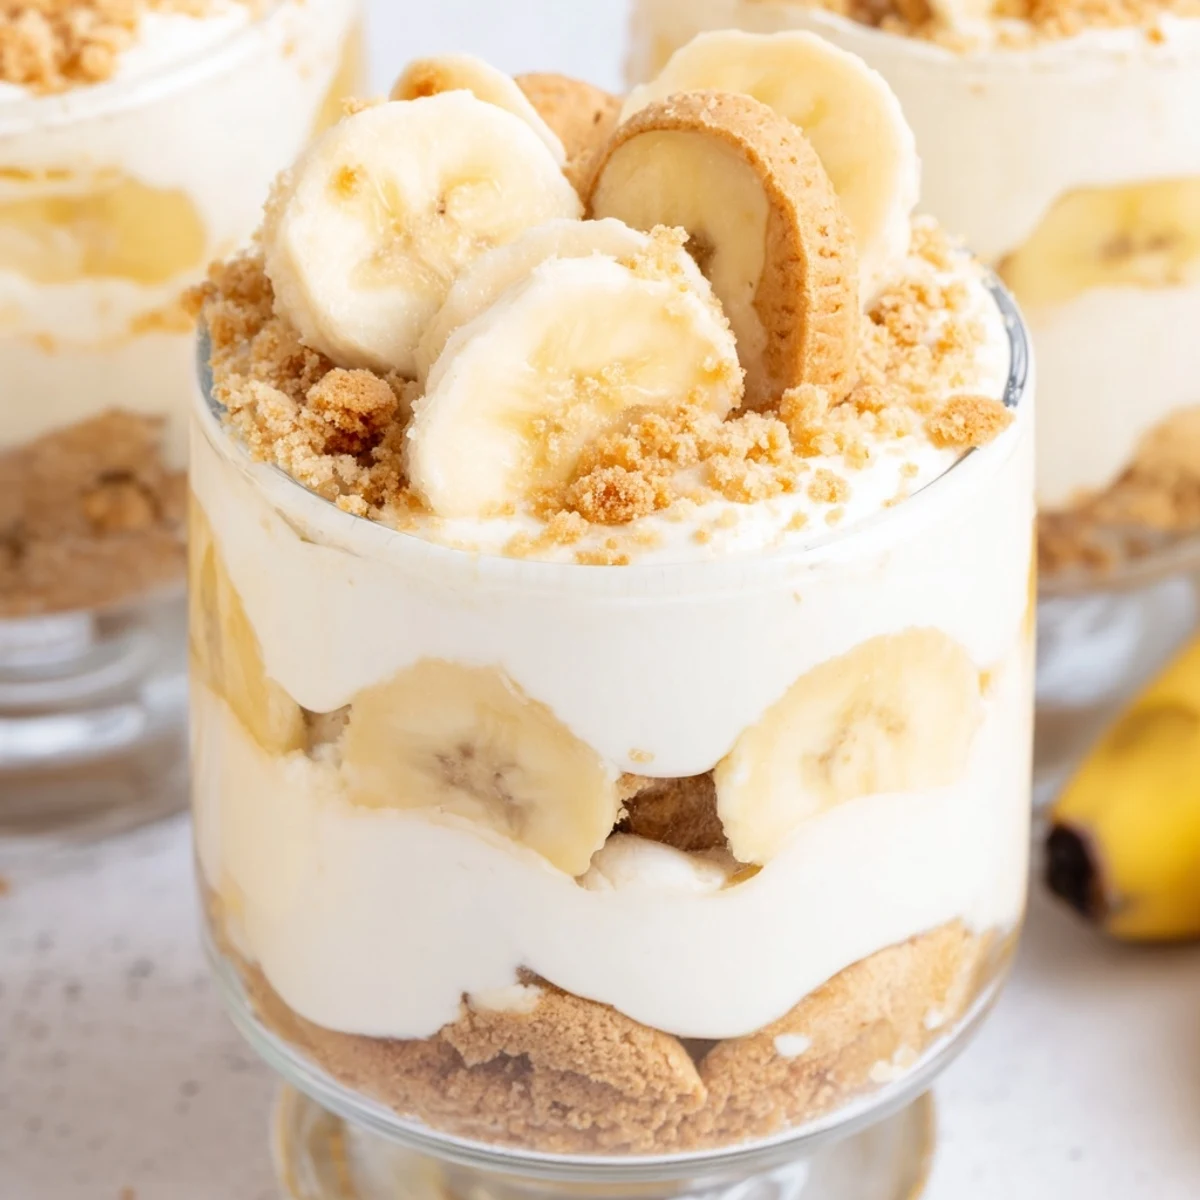
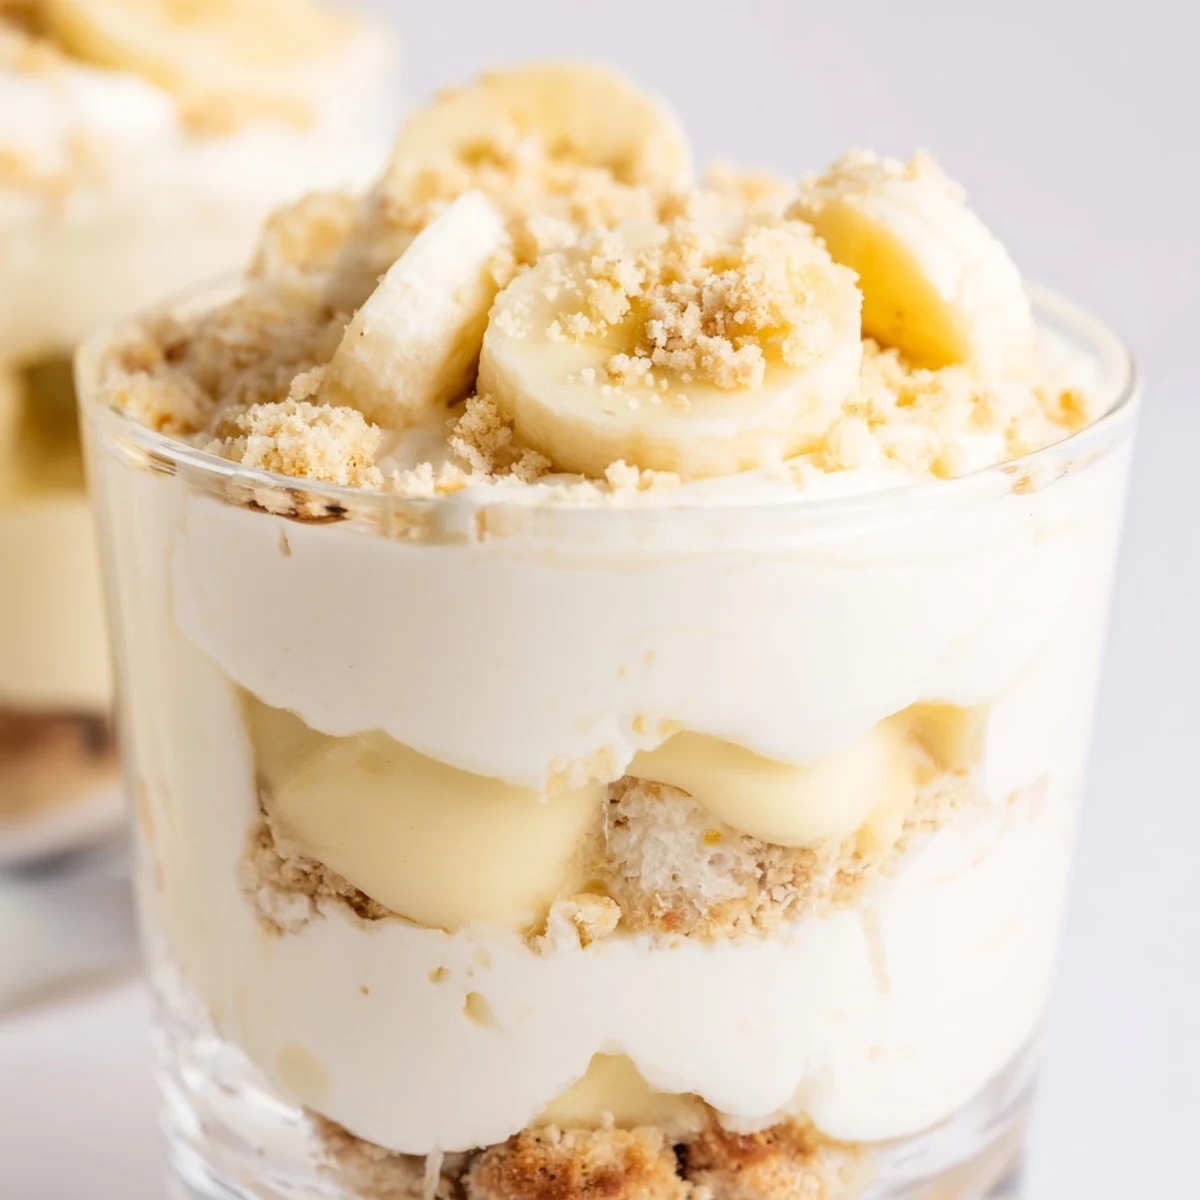
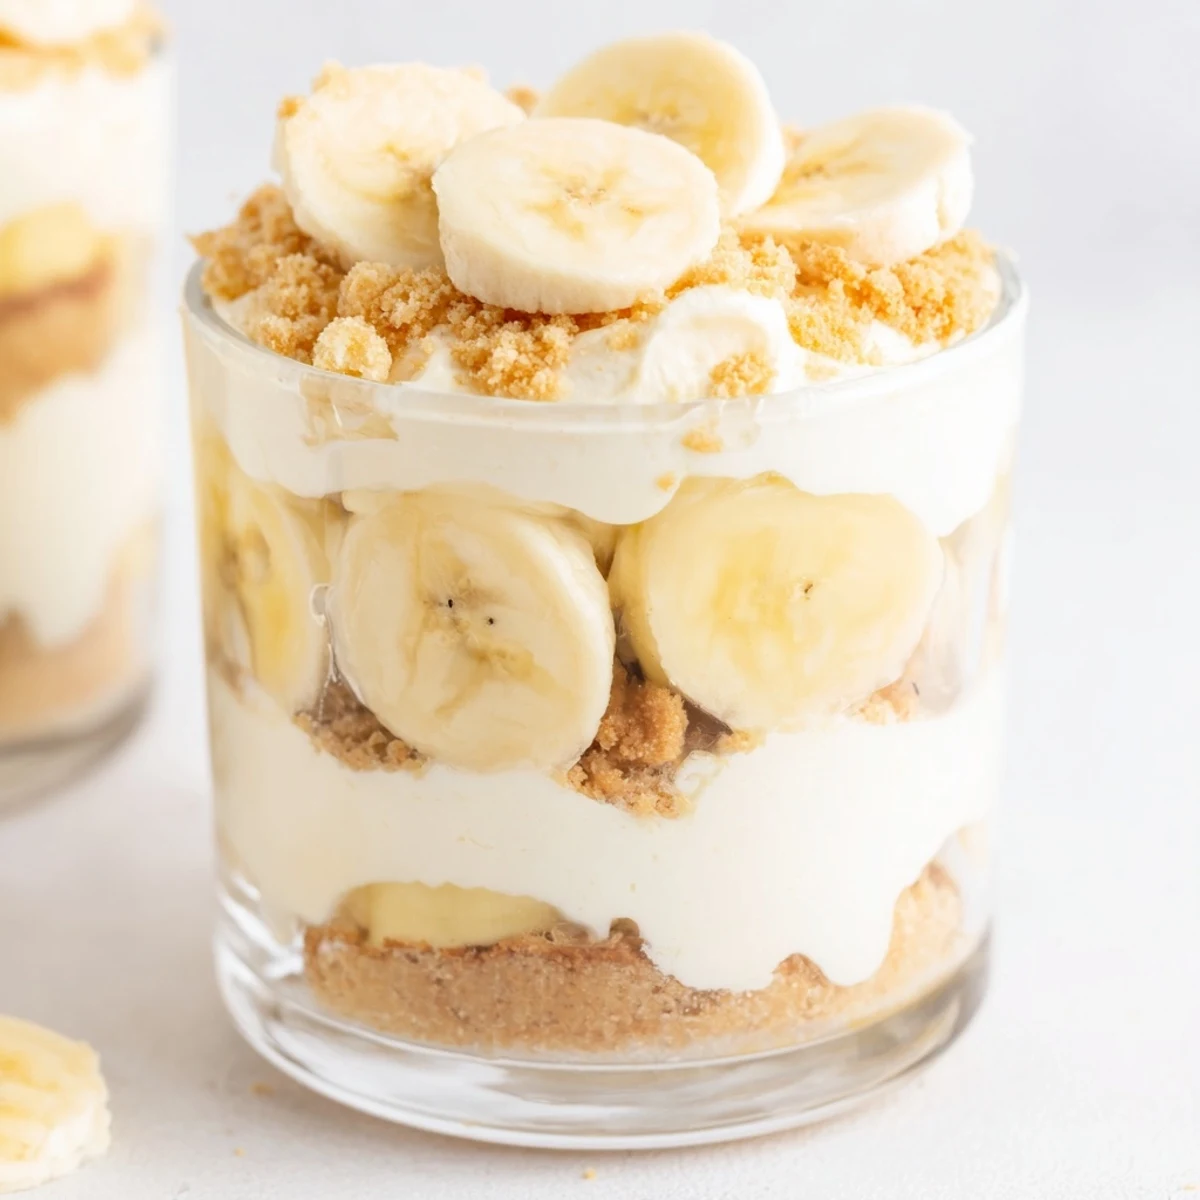
Save These individual cups combine the best of two beloved desserts—rich cheesecake and classic banana pudding—into one convenient handheld treat. The vanilla wafer crust provides a buttery foundation, while layers of velvety cheesecake filling and smooth banana pudding create luxurious texture throughout. Fresh banana slices add natural sweetness and vibrant flavor, complemented by the satisfying crunch of wafer crumb topping.
Since these require no baking, they're perfect for warm weather entertaining or when you need an impressive dessert without heating up the kitchen. The individual portion size makes them ideal for parties, potlucks, or elegant dinner service. Each cup offers the perfect balance of creamy, crunchy, and fruity elements that will delight banana dessert enthusiasts.
The first time I made these, I was running late for a potluck and needed something impressive but fast. My friend Sarah took one bite and literally stopped mid-conversation, eyes wide, asking what was in these cups. Now they're my go-to when I want to make people feel special without turning on my oven.
Last summer, I made these for my daughter's birthday instead of a traditional cake. She told me later it was the best dessert she'd ever had, and honestly, seeing her face light up when she took that first spoonful made all the layering worth it. Sometimes the simplest desserts create the biggest memories.
Ingredients
- Vanilla wafer cookies: These classic Nilla wafers bring that childhood banana pudding nostalgia, and crushing them creates the perfect buttery foundation that holds up beautifully against the creamy layers
- Unsalted butter: Melted and mixed with the crumbs, this binds everything together into a crust that actually stays put when you dig in
- Cream cheese: Make sure it's properly softened to room temperature or you'll end up with lumpy filling instead of that silky smooth texture we're after
- Heavy whipping cream: Cold cream is non-negotiable here, it whips up beautifully and lightens the dense cream cheese into something almost mousse-like
- Instant banana pudding mix: The shortcut that makes this recipe accessible, and honestly, sometimes the boxed stuff just hits differently than homemade
- Ripe bananas: Look for bananas with some brown spots, they're sweeter and mash better into the layers without turning mushy
Instructions
- Build the buttery crust foundation:
- Toss those crushed vanilla wafers with melted butter until every crumb is coated and smells like heaven, then press about two tablespoons into the bottom of each cup. Use the back of a spoon to really pack it down so your layers don't slide around later.
- Create the velvety cheesecake base:
- Beat that softened cream cheese with sugar and vanilla until it's smoother than a jazz record, then whip your cold heavy cream until stiff peaks form before gently folding it in. This folding step is where the magic happens, turning heavy cheesecake into something light and airy.
- Whisk up the pudding layer:
- Mix that instant banana pudding with cold milk for exactly two minutes, no more, no less, until it's thickened into that familiar creamy consistency we all know from childhood lunchboxes.
- Layer it all up like a pro:
- Spoon half the cheesecake mixture over your crust, add those fresh banana slices in a single layer, then pour the pudding over before topping with the remaining cheesecake mixture. Take your time with each layer, wiping the sides of the cups if you want that pristine restaurant look.
- Add the finishing touches:
- Sprinkle extra wafer crumbs on top, arrange a few more banana slices prettily, and add that dollop of whipped cream if you're feeling extra. Cover everything up and let them chill for at least two hours so all the flavors can become best friends.
 Save
Save My grandmother always said that desserts made in individual portions make people feel seen and valued, and I've found that to be true every time I serve these. There's something intimate about having your own little cup, your own perfect ratio of crust to cream to pudding.
Making These Your Own
Once you've mastered the classic version, try swapping the vanilla wafers for graham crackers or even Biscoff cookies for a totally different flavor profile. I've made these with chocolate pudding mix instead of banana, and let me tell you, that version disappeared faster than I could photograph it.
Perfect Presentation Tips
Clear glass cups or jars are your best friend here because those layers are honestly too pretty to hide. I use wide-mouth mason jars when I'm taking these to parties, and people always assume I bought them from some fancy bakery.
Timing And Storage
These can be made up to 24 hours in advance, which is basically a gift from the dessert gods when you're hosting. Just wait to add those fresh banana toppings until right before serving so they stay pristine and don't start looking sad.
- If you're making these for a crowd, set up an assembly line and work in batches, it goes so much faster
- Leftovers actually keep pretty well for a day or two in the fridge, though the crust will start to soften slightly
- For maximum freshness, add any final whipped cream topping just before serving so it doesn't deflate
 Save
Save There's something deeply satisfying about serving a dessert that makes people close their eyes and sigh, and these cups deliver that moment every single time. They're simple, nostalgic, and absolutely perfect.
Recipe FAQs
- → Can I make these cups in advance?
-
Yes, these cups can be prepared up to 24 hours in advance. For best results, add the fresh banana slices and wafer crumb topping just before serving to maintain optimal texture and prevent browning.
- → What type of serving cups work best?
-
Clear glass dessert cups, small mason jars, or parfait glasses work beautifully as they allow you to see the attractive layers. Each serving vessel should hold approximately 6-8 ounces.
- → How do I prevent bananas from turning brown?
-
Toss the sliced bananas lightly in lemon juice before layering them into the cups. This simple step helps maintain their fresh appearance without noticeably affecting the flavor.
- → Can I use homemade pudding instead of instant?
-
Absolutely. Homemade vanilla pudding infused with mashed ripe banana makes an excellent substitute. Allow the pudding to cool completely before assembling the cups to maintain proper layer consistency.
- → What's the best way to crush vanilla wafers?
-
Place the wafers in a resealable plastic bag and crush them with a rolling pin, or pulse them in a food processor for evenly fine crumbs. You'll need about 25-30 standard vanilla wafers for the crust.
- → Can I freeze these cups?
-
Freezing is not recommended as the texture of the banana pudding and fresh bananas will become compromised. These are best enjoyed refrigerated within 24-48 hours of assembly.
